As a Southeast Asian and Middle Eastern workshop distributor and vehicle accessories retailer, you understand how vehicle convenience is becoming a priority across the board. A good example is the automatic tailgate kit for vehicle fleet management. It provides your customers with ease and luxury while offering you the opportunity to work with a product that is simple to install. What is the process of installing a kit of this type on a vehicle? There are general installation steps that are fairly similar. Always keep in mind that each vehicle may have a different kit. Always refer to the kit instructions.
Before you do anything with the vehicle, you need to prepare. For example, the kit you are using has to work with the particular vehicle model. A kit, for instance, would have to match a specific SUV perfectly. If you can, make sure you have all of the tools you need on hand. You will need basic hand tools, like a socket wrench and screwdrivers. You will also need tools for removing the trim to avoid damaging the car's interior. Safety is also key. You have to make sure to keep the vehicle's negative battery terminal disconnected. A clean, well-lit workspace will also make the job easier and safer. Having a clear, consistent, standardized process saves business customers, like a workshop, time and money.
You need to access the mounting points and wiring channels. Do this by removing the tailgate's interior trim panel. Be careful. The trim can be easily scratched or damaged by the wrong removal tool. Each trim panel has clips and possibly screws. Once you take off the panel, you can see the inside of the tailgate. This opens up access to the original gas struts and the wiring for the wiper, defroster, and license plate lights. Do not be too hasty here. If you break clips and have to replace them, the fit will be poor, and the end customer will not be happy.
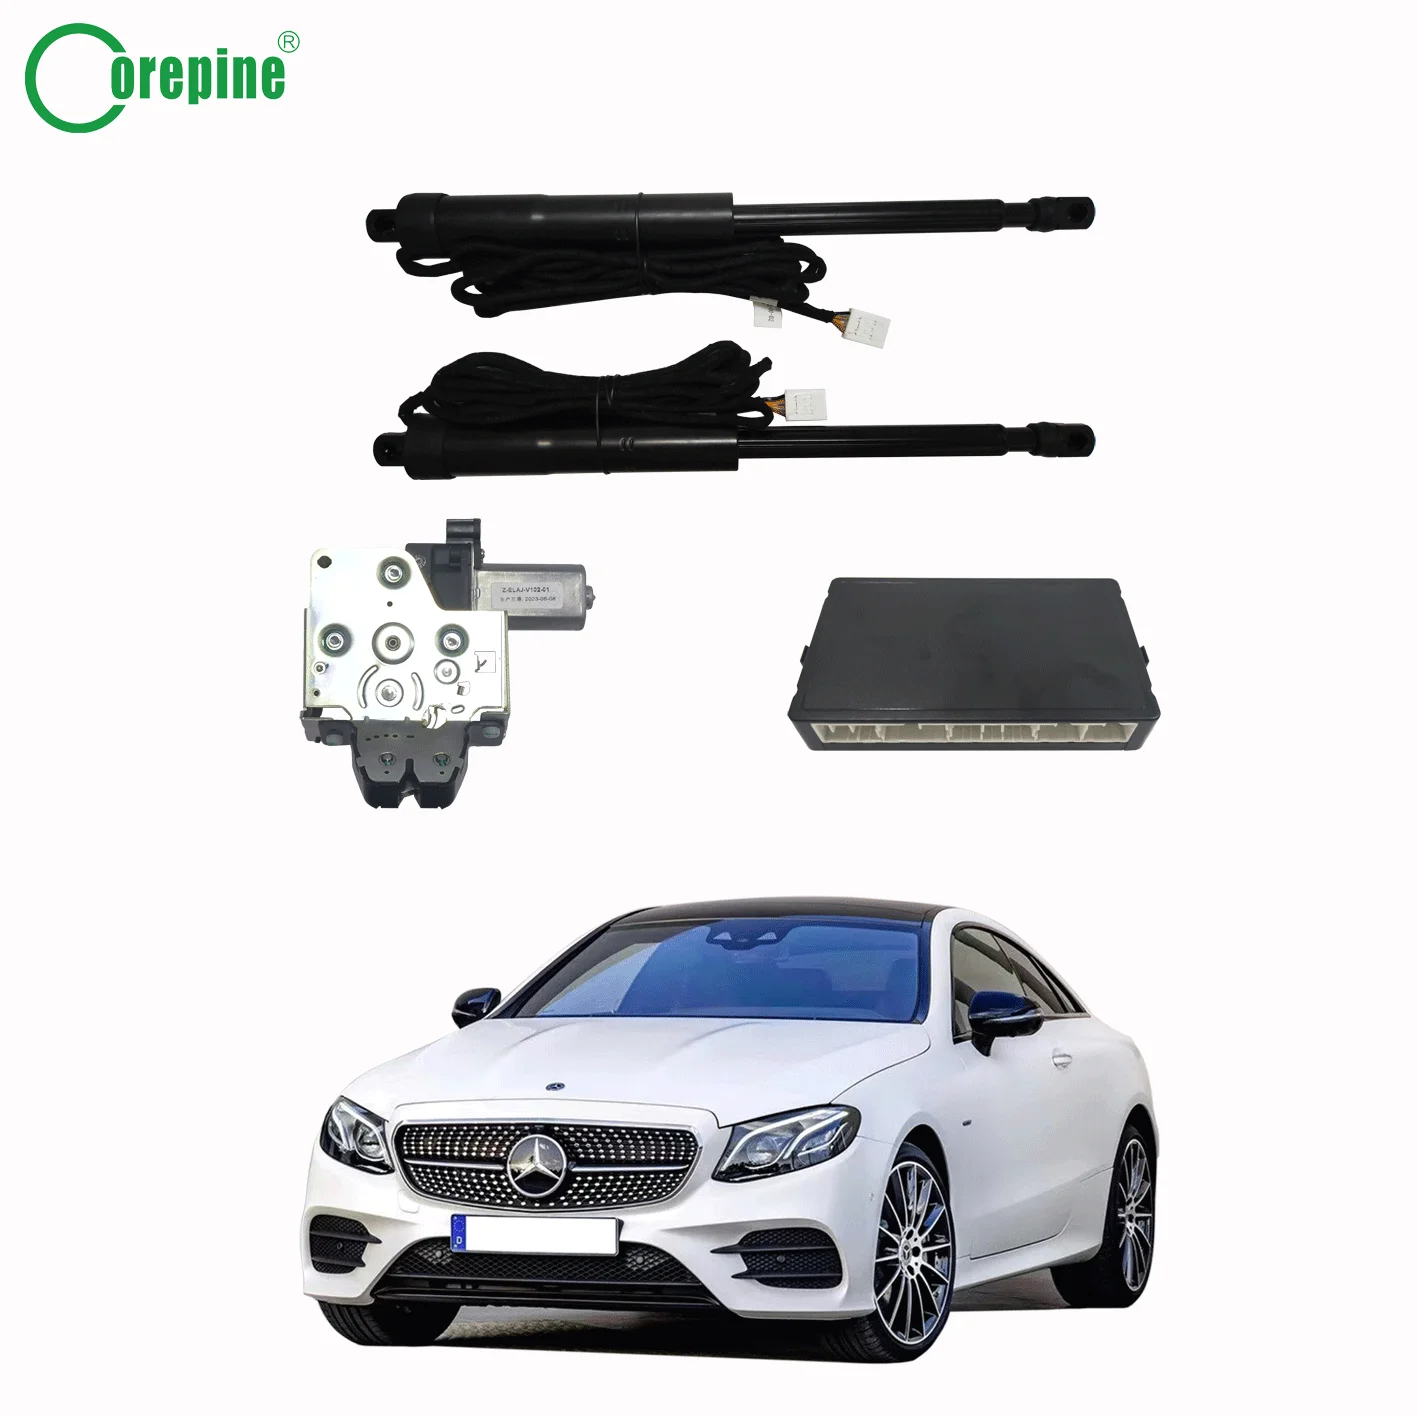
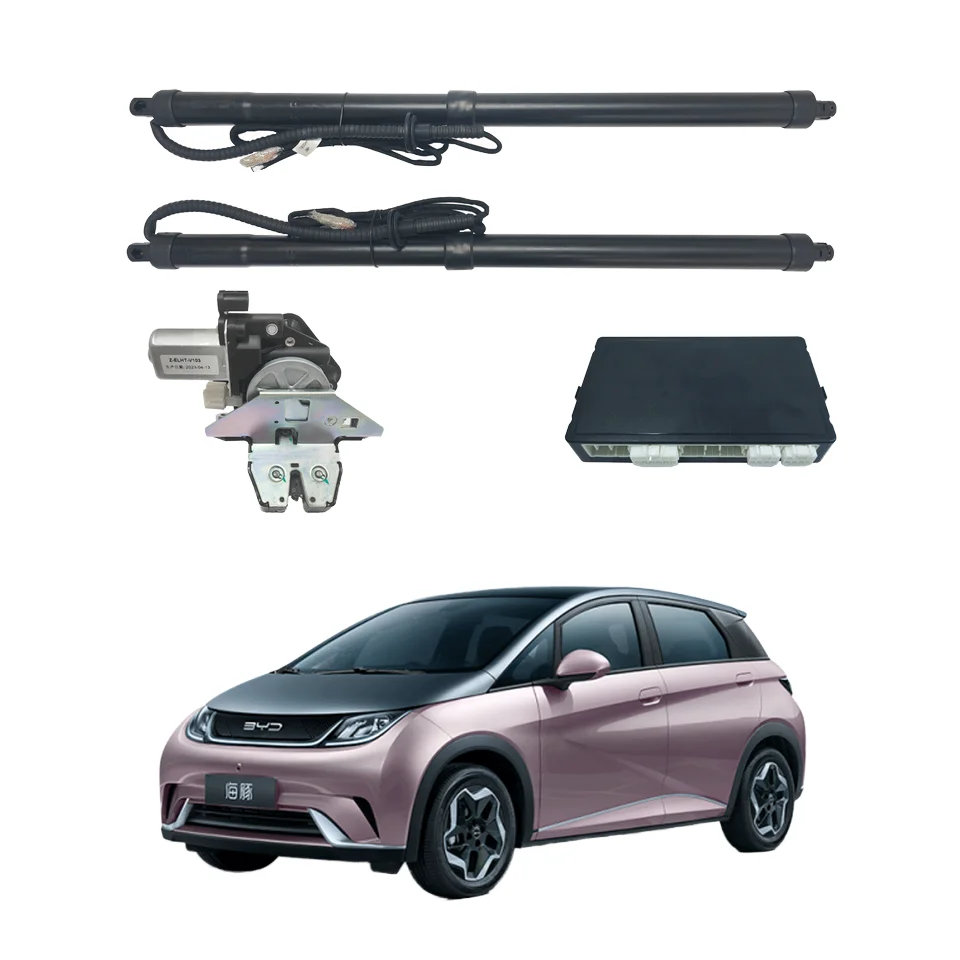
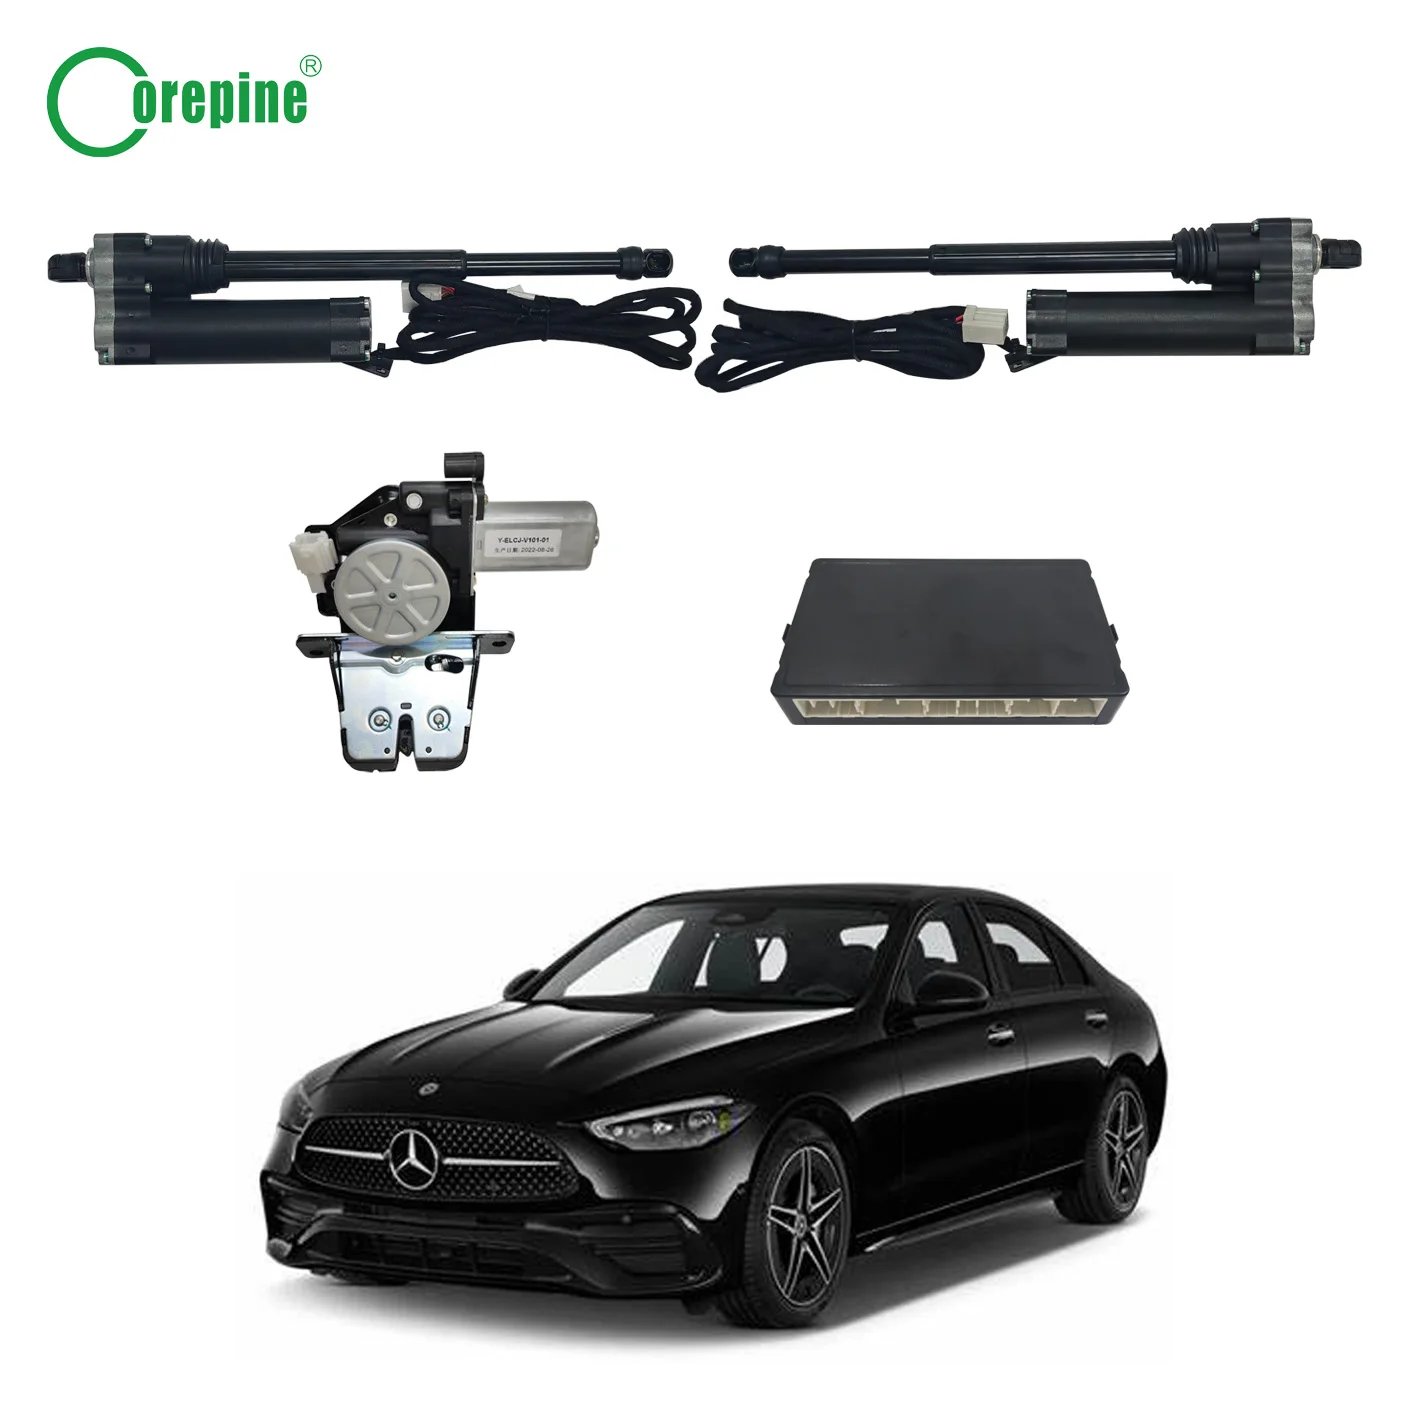
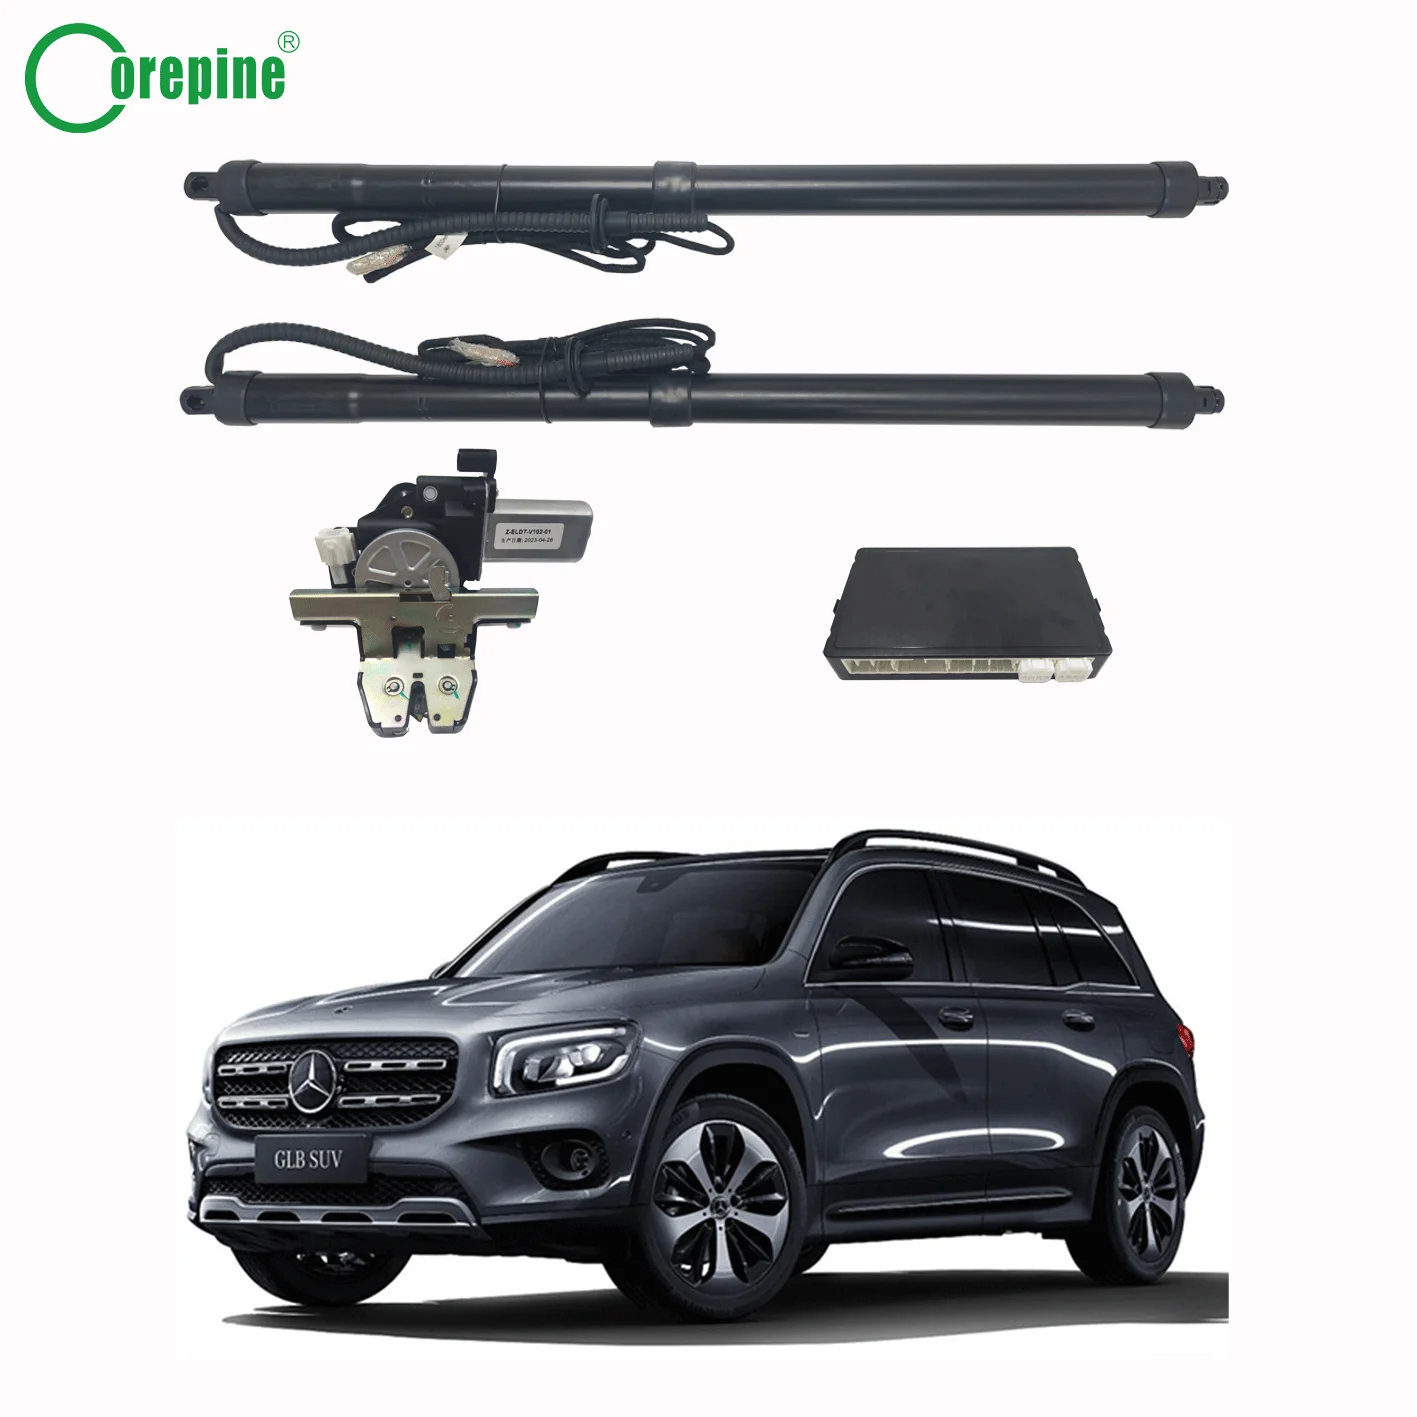
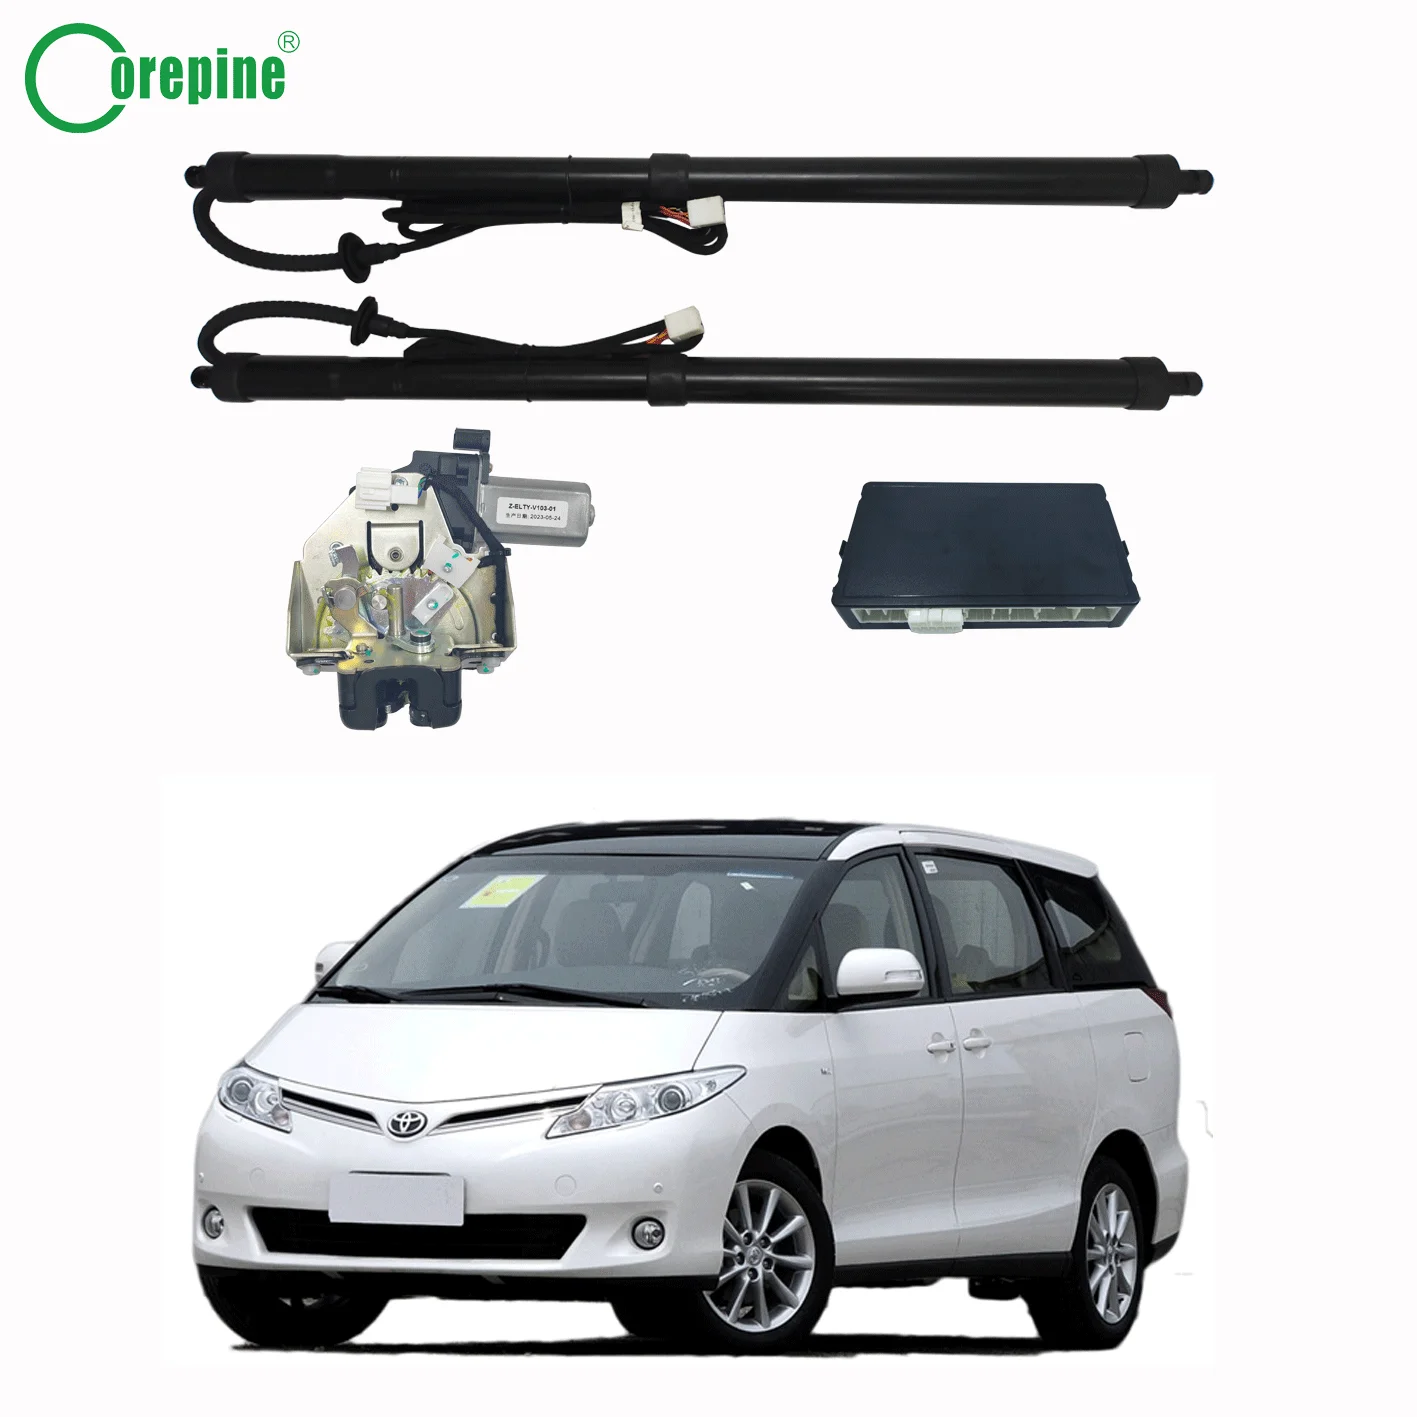
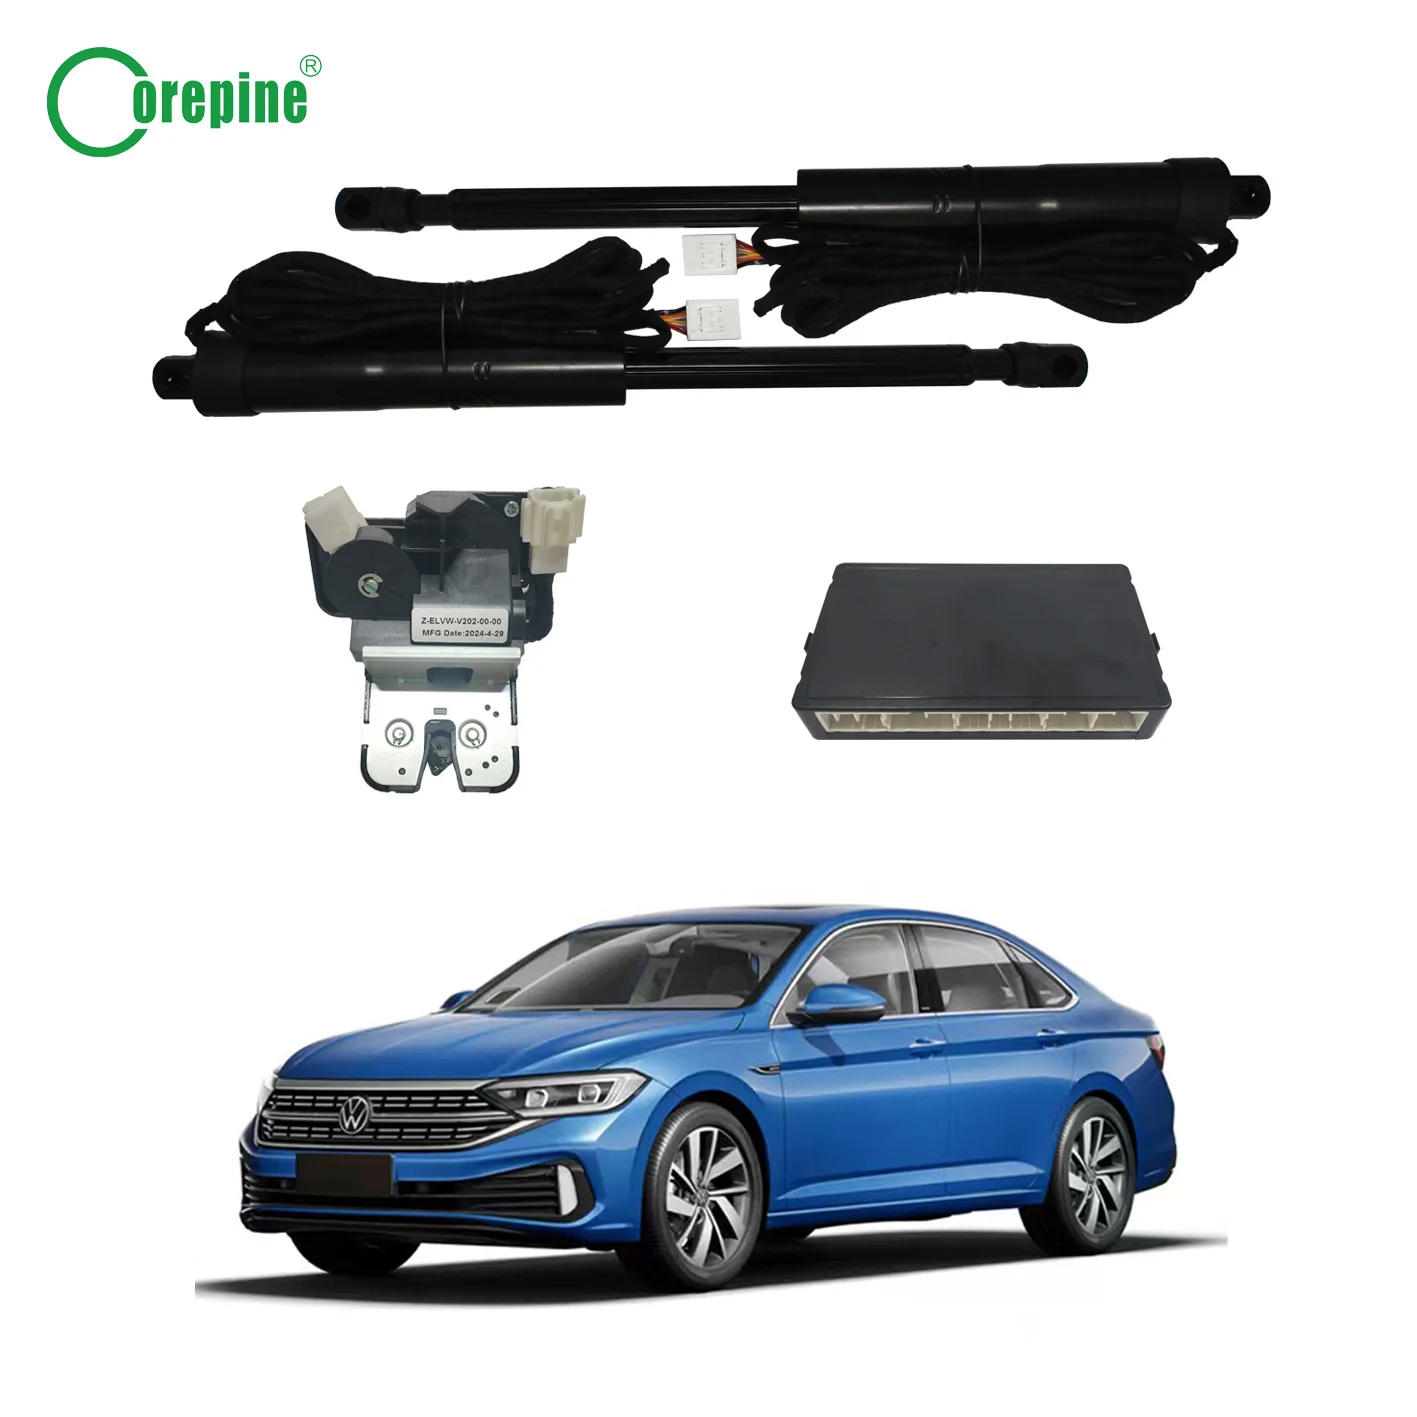
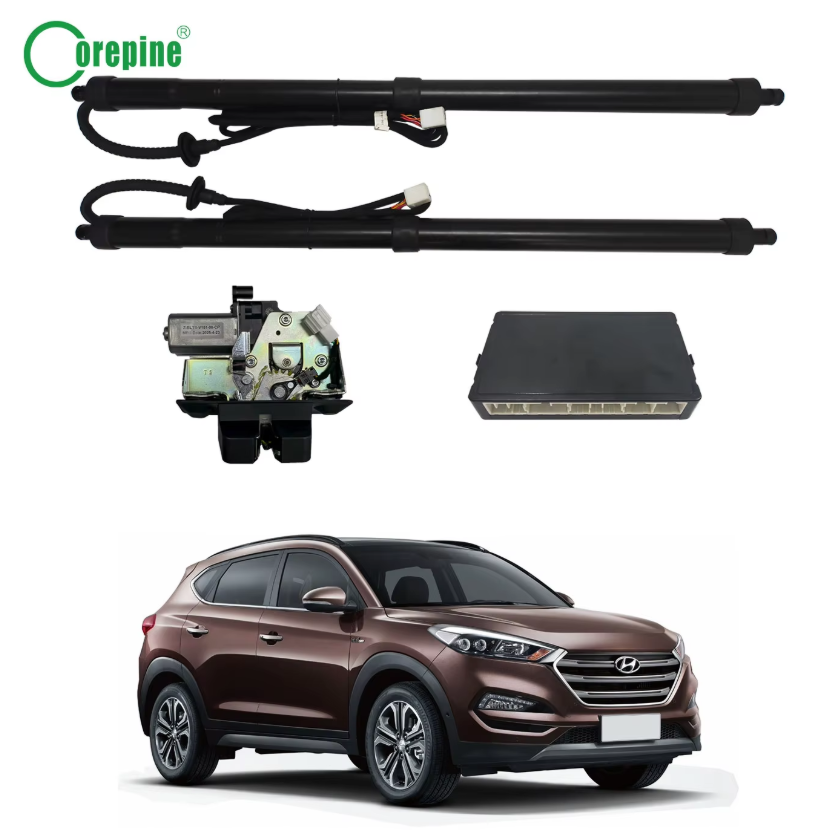
The electric struts replace the standard manual gas struts. First, because the tailgate is heavy, you should support it. You can do this either by using a prop rod or with the help of a partner. After that, you can unclip the original gas struts from their mounts. Using a small pry tool or flathead screwdriver can be helpful, but be gentle as you can damage the tailgate or the vehicle body. After the original struts are removed, you can install the new electric struts from the kit. Remember, the new struts have the motors that do the heavy lifting, so make sure they snap firmly into place.
This task requires the most effort. The automatic tailgate kit comes with its own wiring harness that must be integrated with the vehicle's electrical system. This harness needs to run along the tailgate and then go through the flexible rubber sleeve that connects the tailgate to the vehicle body. Then the harness needs to go into the cabin. This sleeve is not easy to fish the wires through. Using some lubricant or a stiff wire as a leader may be useful. Once the wiring harness is inside the vehicle, it has to go to the fuse box, the control module which is often located in the kick panel area, and if the kit comes with an interior button, then it has to reach the front of the driver's side. The installation looks more professional when the wires are secured with zip ties, and it also prevents rattling.
The electronic control module serves as the brain of the entire system. This small computer controls the movements of the tailgate. It is important to connect the control module as the instructions say. The module should be mounted in a sheltered, dry area behind a trim panel. The kit will also include a latch mechanism. This replaces the tailgate's original latch. The electric latch is what lets the system pull the tailgate closed and also release it to open. It is essential to connect the latch correctly for the system to lock and unlock properly. More advanced kits may include a sensor that detects obstacles, preventing the tailgate from closing on something. In humid Southeast Asian climates, it is very important that all connections be secure to prevent weather related damage.
To get the full value of the convenience features, there needs to be a way to control the tailgate. An automatic tailgate kit comes with different options. One is a switch that you can install inside the vehicle, typically on the driver's side dashboard or on the center console. This involves finding a location, drilling a clean hole for it if needed, and wiring it to the harness. You can also program the kit to work with the vehicle's factory remote, which is a common step. This can often be done in a few minutes with a simple plug and play connection and a quick push of a button. Additionally, there is usually a switch on the tailgate itself that allows you to close it from the outside. For a business customer, the selling point is the ease of use for their drivers.
With everything connected, the moment we have all been waiting for has arrived. First, reconnect the vehicle's battery. Always do a quick visual check of all connections. Next, operate the tailgate using the interior button, the key fob, and the outer tailgate button. Observe its movement. Is it opening and closing smoothly? Does it stop at the correct height? Most systems let you set the opening height, which is great for low garages. Test the safety reverse function by placing an object in the way as it closes. It should stop and reverse. If anything seems wrong, recheck your connections and programming. Testing thoroughly is the best way to ensure the product works as promised and to build trust with your distributor or end user.
If everything looks good, you can finally put the tailgate back together. Be careful when putting the interior trim panels back on, and make sure everything clicks into place. Double check everything you did. Make sure wires are not pinched anywhere and that they are not touching sharp edges. Lastly, clean the interior and remove any marks or signs of your work. A clean and professional look will reflect positively on your business. For wholesale clients, a simple and trustworthy installation process leads to repeat customers.
For partners in Southeast Asia and the Middle East, from large auto parts distributors to busy installation centers, the installation process is only one piece of the puzzle. The quality of the automatic tailgate kit itself determines how many of these installations will be trouble free. Kits from reputable manufacturers that have invested years in research and development and have a dedicated engineering team tend to be better designed for easier installation and long term reliability. These kits are made of quality materials that can endure heat, dust, and humidity. Trusting a quality supplier means you buy more than just a kit. You get technical support, consistent quality, and a partner who helps your business grow by building strong relationships with your customers.
 Hot News
2024-12-23
2024-12-16
2024-12-09
2025-05-14
2025-05-12
2025-09-30
Experience the ultimate in car convenience with Corepine advanced electric tailgates. Our smart solutions offer effortless cargo access, enhancing your driving experience.
Zhongkai High-tech Zone, Huizhou, Guangdong, China
Copyright © 2025 by Huizhou Yopine Technology Co., Ltd Privacy Policy